 Part 1: Box


 Huge box is huge box. It was so huge, I had to fold it in two even after flattening it to fit into our luggage...
Part 2: Box open!


 No matter how you look at it, that's a lot of runners!
Part 3: Runners!
 TT Hongli really likes to put many runners in one plastic bag. Really economical but it will risk more scratches onto the parts IMO. Also, the plastic bags can be opened as they are sealed via a sticky surface (dunno how to call it). So, you don't need to cut the bags like we normally do for other grades. Neat.


 Part 5: Other Materials


 Part 1 : Arms


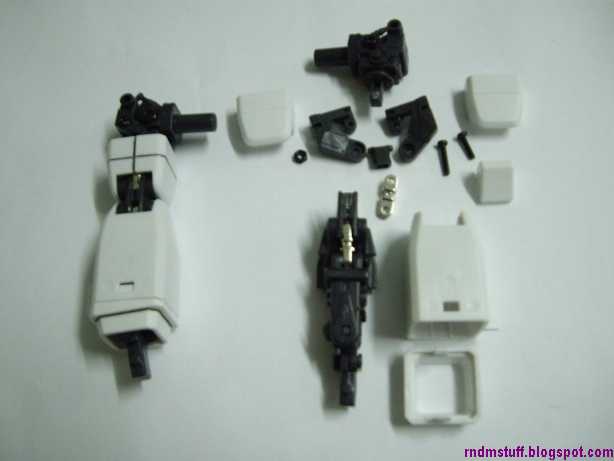
As you can see from the construction shots, you need to unscrew some parts if you want to display the inner frame. I'm too lazy to do that. ^^;
 Decided to paint the yellow parts gold. If there are silver pistons, there must be some gold somewhere. XD
I actually put together the shoulder armor of the right arm wrong in that shot. I fix it right after though. x.x
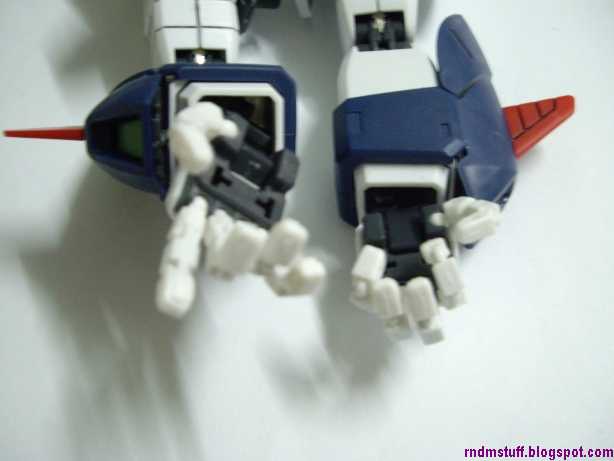
 The arms is the second easiest section to build. Second to the wings that is.
Gotta love the pre-assembled fingers. The fingers are pre-assembled, so putting this part together is relatively easy and painless.


The fingers feels soft (IMO) an quite nice to play with.
 It can't bend to a complete 180 but it is good enough. I actually don't dare to push it too far as I'll risk the pistons to come out. >.>;
 The pistons I speak off. Don't try to pull the joints too far or else they might pop off...
 The wrist are quite flexible! They are not the same, at all, compared to any grades I've built before. I can't really show much of it but they can move about similar to human wrists. Really nice.
Note: The rear area of the blue part of the arm has some obvious molding marks on them. Not so obvious through the shots I've taken though. I know some of you may not like this fault but it doesn't really bother me since I normally look from the front. ^^;
Part2:legs


 Relatively simple build. I advise you to use superglue for the gray connecting section of the feet to the red armor in the front (if you understand) so that the feet armor don't come off easily. ^^;
 The actual screw for the feet, previous one was the wrong one. XD

 Quite flexible in design but doesn't actually do any justice once everything is put on.


 Sliding mechanism for the hip armor. You can see a bit of the pistons inside.
Part 3 :Waist,torso,Head

 Relatively simple build. I advise you to use superglue for the gray connecting section of the feet to the red armor in the front (if you understand) so that the feet armor don't come off easily. ^^;
 The actual screw for the feet, previous one was the wrong one. XD
 Quite flexible in design but doesn't actually do any justice once everything is put on.


 Sliding mechanism for the hip armor. You can see a bit of the pistons inside.
Due to the LED gimmick, construction of this part virtually continues from waist until the backpack...


 The Wing stands firmly without its wings on. If you want to play with it, I advise you to take of the wings. XP


Part 4:Wing & Weapon


 The beam sabers. I suggest you superglue the tip part because its quite loose. To push out the connectors to the palm, you might need to use a knife (got this idea from Dalong) or have sharp nails.
I also suggest you to sand off the "peg" of the beam part as it won't go in easily if you don't.


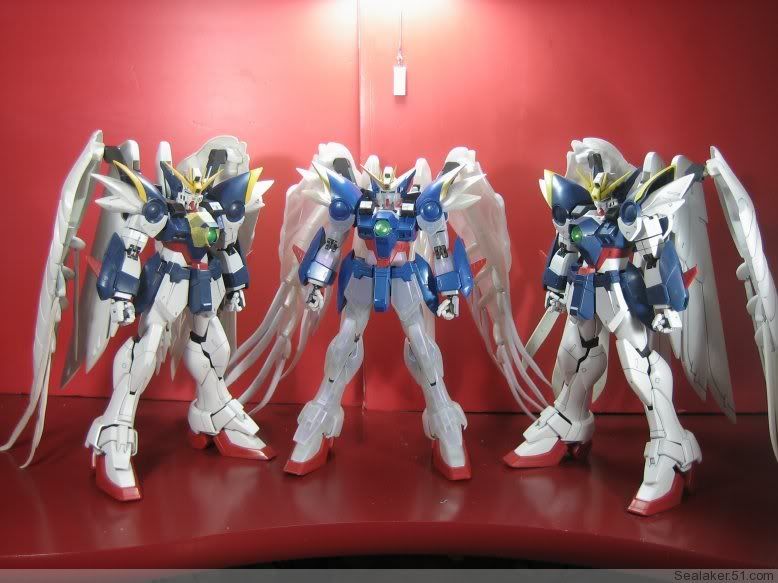
This finished product!
Part 5: Conclusion
Pros
Pros
- Darn close to the original. Credits to chev_chelios (Lowyat forums) for the pic (his friends').
- Damn cheap. Since its a bootleg, you can pretty much get it no more expensive than a standard priced original MG.
- Most parts can fit in perfectly. However, a few need effort to be put in.
- Quite stable on its feet even though you might not think so in the first place. Way more stable than the 1/60 Exia. XP
- LEDs can light up...
- Its a PG!
Cons
- Some parts need a little extra effort/force to put together (eg, upper torso area, LEDs).
- LEDs can't be installed successfully due to the screws not being able to screw in at the last step...
- Some parts like to come off easily when posing (ankle armor, wings). A bit of superglue can fix this problem easily though as only a few of them exhibit the problem. If you don't try to extensively pose it like me, you might not really feel it. XP
- Some minor missing details. You might not notice them missing in the end though...
- Can't really hold the TBR easily. Some help from a smaller base, like what I did, can alleviate this problem though.
- This guy totally should have had a base included with it! <- Bandai's fault. x.x
Overall, this bootleg is very good. No, extremely good! There might be difficulties during construction but many have already assembled it successfully, so it is not impossible to build and keep it nicely in your display cupboard. =)
SPONSOR: www.popbuying.com CONTACT: jason@popbuying.com
SPONSOR: www.popbuying.com CONTACT: jason@popbuying.com
http://rndmstuff.blogspot.ca/2010/01/tt-hongli-pg-160-wing-zero-custom_08.html
ReplyDelete-copy paste Pros and cons?